

Hey there, DIY dreamers—I’m Kylie, and I’ve got a rustic shelf project that’s screaming your name!
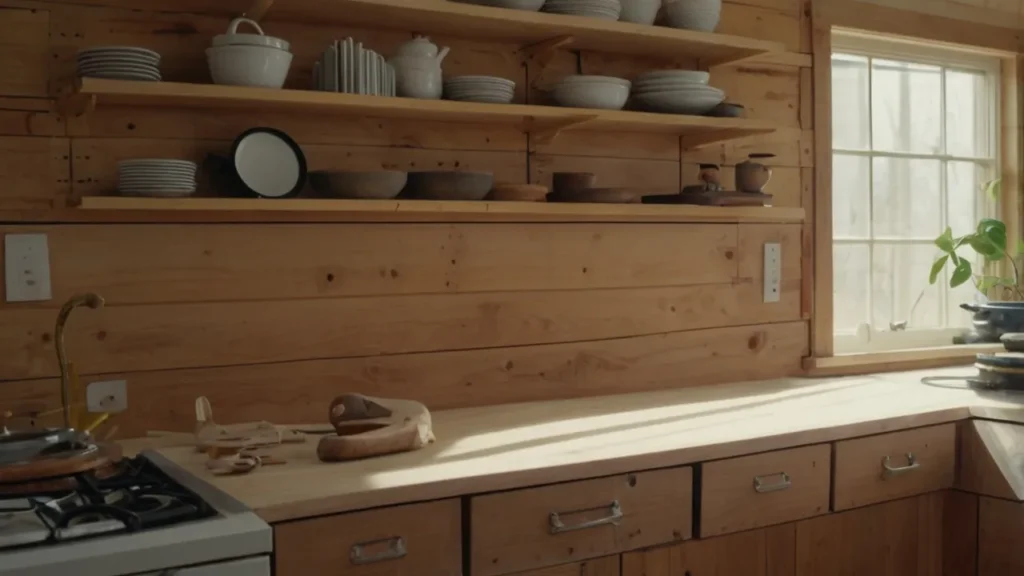
Okay, confession time: my kitchen used to have this sad, empty wall that stared at me like, “Kylie, do something already!” Sound familiar? If your space is begging for a vibe lift—and you’re itching to get your hands dirty—I’ve got you. I’m Kylie, your kitchen vibe curator, and today we’re making a rustic shelf that’s so easy and cute, you’ll wonder why you didn’t try it sooner. No fancy tools, no big budget—just pure “Kylie’s Kitchen Vibes” magic.
Shelves are my jam—they’re like little stages for your fave kitchen treasures, from herbs to that quirky mug you can’t part with. And rustic? That’s my heart—think weathered wood, cozy feels, and a nod to those Italian vibes I spilled about a few posts back. This DIY’s all about “how to decorate with…” stuff you’ve got or can snag cheap—thrift-store finds, a little elbow grease, and a whole lotta love. Ready to turn that blank spot into a rustic win? Let’s dive into my three-step vibe to make a shelf you’ll adore!
Step 1: Find Your Wood—Kylie’s Way
Why It Works: The right wood sets the rustic tone—it’s the soul of your shelf.
I’m a thrift-store junkie—seriously, it’s where the best stuff hides. You don’t need a lumberyard; you need a treasure hunt. This is the “decorate with…” foundation—wood that’s got character, not perfection.
Kylie’s Tips:
- Thrift It: Hit up a secondhand shop or flea market—I snagged a beat-up plank for $2 that’s now my shelf star. Old crates or pallet pieces work too—just yank ‘em apart with a hammer (Kylie’s stress relief!).
- Size It Up: Aim for 2-3 feet long, about 6-10 inches wide—perfect for a kitchen wall without overwhelming it. I’ve got one that’s 30 inches—holds my basil pots like a champ.
- Weathered Wins: Look for scratches or knots—imperfect’s the rustic goal. If it’s too clean, don’t worry—we’ll fix that next.
Kylie’s Vibe Check: Don’t overthink it—grab what feels right. A little wonky? Even better.
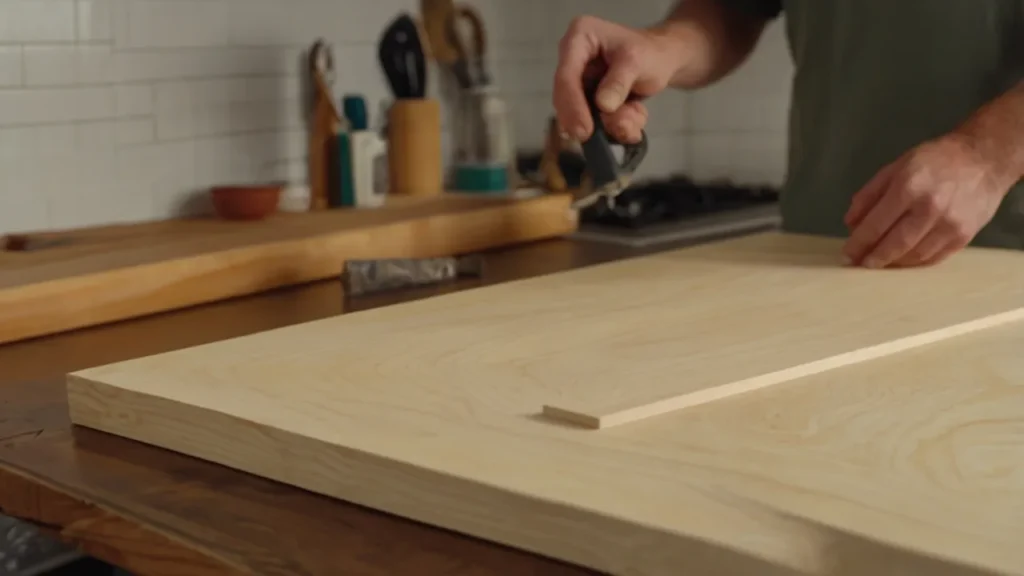
Step 2: Sand & Style—Make It Yours
Why It Works: A little TLC turns that wood into a rustic masterpiece—Kylie’s secret sauce.
This is where the fun starts—I love getting hands-on, and sanding’s like therapy (with better results than my last vent sesh!). It’s all about giving that wood a vibe—smooth enough to touch, rough enough to feel real.
Kylie’s Tips:
- Sand It Down: Grab some medium-grit sandpaper (80-120)—I got a pack for $3. Rough up the edges, smooth the top—takes 10 minutes tops. I’ve got a plank I sanded ‘til it felt like an old barn door—pure rustic love.
- Stain or Skip: A quick wipe with tea or coffee ages it—Kylie’s cheapo trick. Want deeper vibes? A $5 wood stain (walnut’s my go-to) does it. Skip if you love the raw look—I’ve got one unstained that’s still a stunner.
- Distress It: Bang it with a hammer or scrape it with a key—Kylie’s all about that “lived-in” charm. My shelf’s got a dent that looks like it’s been there forever—accidentally perfect.
Kylie’s Vibe Check: Stop when it feels you—too polished kills the rustic soul.
Step 3: Hang & Decorate—Vibe It Up
Why It Works: The right hang and decor make your shelf the kitchen’s MVP—Kylie’s finishing touch.
You’ve got your rustic beauty—now let’s get it up and vibing. This is the “decorate with…” payoff—showing it off with stuff that screams your style. No nails? No problem—Kylie’s got hacks for that too.
Kylie’s Tips:
- Hang Easy: Two L-brackets—$4 at a hardware store—screw ‘em into the wall, plop the shelf on top. I’ve got mine on brackets I painted black—rustic meets sleek. No drill? Lean it on a counter edge—Kylie’s lazy-day win.
- Green Vibes: Pop a faux herb pot or ivy on it—I’ve got a $2 basil that ties back to my Italian post. One plant’s enough—simple’s the vibe here.
- Kylie’s Mix: Add a tiny sign (“Eat” or “Vibe”—teasing my next post!) or a thrift mug. My shelf’s got a chipped cup I adore—quirky and cozy.
Kylie’s Vibe Check: Keep it light—two or three items max. Overload it, and it’s a clutter trap.

Bonus: Kylie’s Quick Shelf Hacks
Why It Works: A little extra love makes it your shelf—Kylie’s pro tips for the win.
I can’t resist a good hack—these are the cherries on top that’ll have you grinning every time you see your shelf.
Kylie’s Tips:
- Edge It: Wrap twine around the ends—I nabbed some for $1 and hot-glued it on. Rustic with a twist.
- Height Play: Stack a small crate under one end—Kylie’s got a $3 find that lifts my shelf just right.
- Swap It: Change the decor with seasons—pinecones now, tulips later. Keeps the vibe fresh without remaking it.
Kylie’s Vibe Check: Pick one hack—too many, and it’s overkill. Simple’s the rustic way.

Kylie’s Wrap-Up: Make It, Love It!
There you go—Kylie’s DIY rustic shelf vibes, from a thrift plank to a kitchen star! Find your wood, sand it with soul, and hang it with love—no fancy skills needed, just a little Kylie flair. This shelf’s your vibe canvas—whether it’s holding plants, mugs, or that random spoon you adore, it’s you.
KDecoreVibe is all about making your kitchen pop, and I’m just warming up. Got a DIY trick you swear by? A thrift score you’re proud of? Spill it in the comments—I’m dying to swap ideas! Next up, I’m tinkering with some kitchen signs—stay tuned for more DIY love. For now, grab that sandpaper, sip something cozy, and let’s make your kitchen the vib-iest spot around. Catch you soon—Kylie’s rooting for you!