Creative Techniques for Decoupage Tray Decor
Decoupage is a fantastic way to transform everyday objects into beautiful, personalized decor. One popular item you can decorate using decoupage is a tray. This versatile project allows you to express your creativity while adding a unique touch to your home. Let’s explore some creative techniques for decorating a tray using decoupage.
Choosing Your Tray and Materials
Before you start, selecting the right tray is essential. Here are some options to consider:
- Wooden Trays: Perfect for classic decoupage projects.
- Metal Trays: Ideal for a sleek and modern look.
- Plastic Trays: Lightweight and easy to work with.
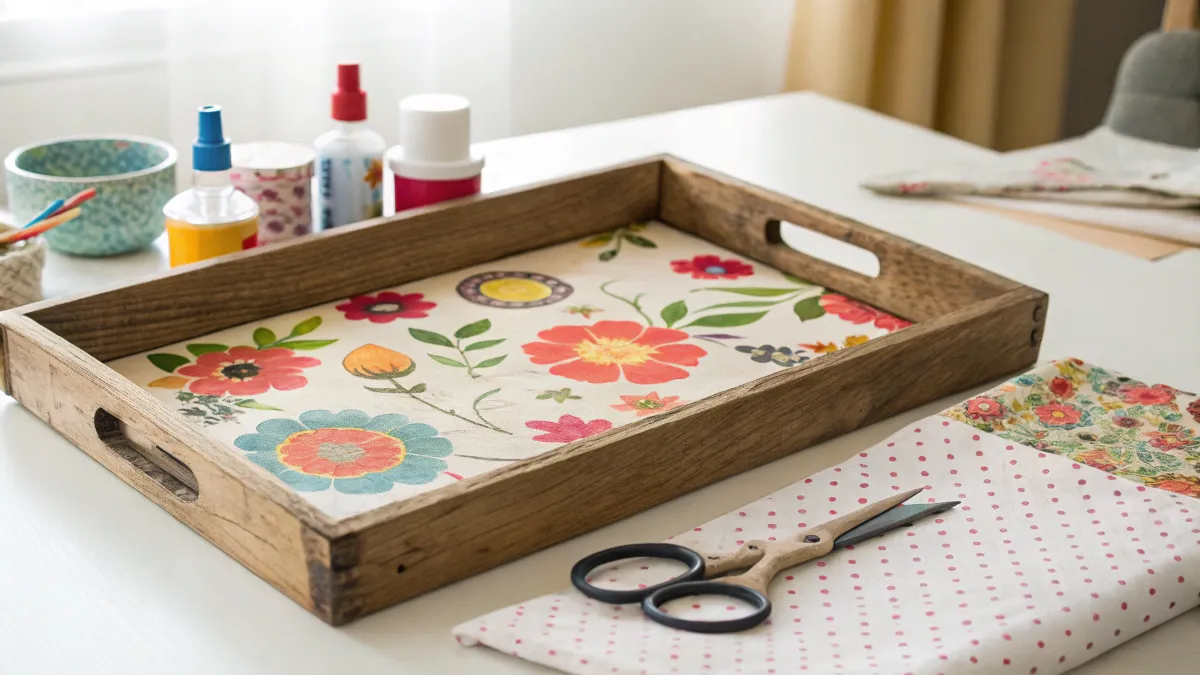
Gather the following supplies:
- Tray (your choice of material)
- Decoupage glue or Mod Podge
- Scissors
- Napkins, tissue paper, or scrapbook paper with desired designs
- Paintbrush
- Sealant (optional)
Preparing Your Tray
Start with a clean surface. If your tray has an existing finish, it’s wise to sand it lightly to help the decoupage adhere better. Wipe off any dust and ensure the surface is dry. A smooth base will make your designs look much better.
Choosing Your Design
Next, think about the design. You can opt for:
- Floral Patterns: For a fresh and inviting feel.
- Geometric Designs: To give a modern twist.
- Personal Photos: For a sentimental touch.
Once you have your design selected, cut out the images or patterns you want to use. If you’re using napkins or tissue paper, remember to separate the layers so that the images are as thin as possible.
Applying Decoupage
Now comes the fun part—applying the decoupage! Follow these simple steps:
- Base Layer: Apply a thin layer of decoupage glue to the tray where you will place your first cut-out.
- Placement: Carefully position your cut-out on the glue. Smooth out any wrinkles or air bubbles. You can use a craft stick for this.
- Sealing: Once the cut-out is in place, brush another layer of decoupage glue over the top. This seals the design and also enhances the finish.
- Repeat: Continue this process with all your designs, overlapping them if desired for a collage effect.
Final Touches
After applying your designs, let the tray dry for at least two hours. Once dry, you might want to add an extra coat of decoupage glue for durability. If you wish to protect your tray further, you can use a clear acrylic sealant. This will help keep your design intact, especially if your tray will be used for serving food or drinks.
Creative Variations
Here are some inventive ways to personalize your tray:
- Seasonal Themes: Change your decoupage designs based on holidays or seasons.
- Mixed Media: Combine decoupage with paint or other craft techniques, like stenciling or embellishments.
- Layering Textures: Use fabrics or textured papers for added depth.
Displaying Your Decoupage Tray
Once your creation is complete and dry, you can use it in various ways:
- Serving Drinks or Snacks: Perfect for entertaining guests.
- Decorative Display: Use it as a catch-all for keys and mail by placing it on a console table.
- Gift Presentation: Fill it with goodies and give it as a thoughtful gift!
With these techniques, you can transform a simple tray into a beautiful piece of art. For more inspiration and tips on decoupage, visit Mod Podge Rocks.
Whether you’re new to crafting or a seasoned veteran, decorating a tray with decoupage can be an enjoyable project that brightens your home. So gather your materials, unleash your creativity, and get started on your new tray today!
Essential Materials You Need for Decoupage Projects
Decoupage is a fun and creative craft that allows you to transform everyday objects into beautiful works of art. Whether you want to personalize a small tray, decorate a box, or enhance furniture, having the right materials makes all the difference. To get started with your decoupage projects, it’s essential to gather the necessary supplies. Below is a detailed list of essential materials you’ll need.
Basic Supplies for Decoupage
The following items are the backbone of any decoupage project. They help you prepare your surface, apply your materials, and finish your piece effectively.
- Decoupage Glue: This special glue, often known as Mod Podge, is essential for adhering paper to surfaces. It dries clear and creates a durable finish.
- Scissors: A good pair of scissors is vital for cutting out your chosen images or designs from paper or fabric.
- Brushes: Use flat brushes or sponge brushes to apply glue evenly. Different sizes can help you with detail work and larger areas.
- Sandpaper: Fine-grit sandpaper helps to prepare the surface of your item, providing a smooth finish and better adhesion for your materials.
Materials for Decoration
Now that you have your basic supplies, it’s time to select the decorative elements that will elevate your decoupage project.
- Paper or Fabric: You can use various types of paper, including scrapbook paper, wrapping paper, or even printed images. Fabric scraps can also work beautifully in decoupage.
- Embellishments: Think outside the box. Consider using stickers, rhinestones, or ribbons to add more character to your finished product.
- Sealant: A clear sealant, like a spray acrylic or polyurethane, can protect your finished project, making it last longer and enhancing the shine.
Optional Tools
While the supplies listed above are essential, there are a few additional tools that can make your decoupage experience even more enjoyable.
- Craft Knife: A craft knife offers precision cutting for intricate designs. It can help you get clean edges that scissors might miss.
- Sponges: Natural or synthetic sponges can be used to apply glue or create texture on your project, providing a unique finish.
- Mod Podge Applicator: If you frequently work on decoupage, consider investing in a specialized applicator that eases the process and improves control.
Workspace Preparation
Having a clean, organized workspace can greatly enhance your crafting experience. Here are a few tips for setting up your area:
- Drop Cloth: Protect your tables or surfaces with a drop cloth or newspaper to catch any glue spills or mess.
- Containers: Use containers to hold your supplies and keep them organized, making it easier to access what you need.
- Good Lighting: Ensure you have adequate lighting to see your details clearly, especially when working with small pieces.
Final Touches
As you create your decoupage masterpiece, consider these finishing touches:
- Final Layer of Decoupage Glue: After your pieces are securely in place, apply a final layer of decoupage glue over the entire surface to seal everything nicely.
- Let It Dry: Always allow ample drying time before handling your project to ensure that everything is set properly.
By gathering these essential materials and tools, you’re well on your way to creating stunning decoupage art. For more inspiration and tutorials, visit Mod Podge Rocks or check out Craftaholics Anonymous. Happy crafting!
Step-by-Step Guide to Decoupage a Tray
If you’re looking to spruce up your home decor with a fun and creative project, decorating a tray using decoupage is a fantastic idea. Not only does it allow you to express your style, but it also helps in turning an ordinary piece into something special. Here’s a straightforward, step-by-step guide to help you decorate a tray with decoupage.
Gather Your Materials
Before diving into your project, make sure you have all the necessary supplies ready. Here’s a list of what you will need:
- A wooden or metal tray
- Decoupage glue (like Mod Podge)
- Paintbrush or sponge brush
- Decorative paper (like scrapbook or tissue paper)
- Scissors
- Sandpaper (for wooden trays)
- Sealant (optional, for extra protection)
Prepare Your Tray
Start by preparing the surface of your tray. If you’re working with a wooden tray, gently sand the surface to remove any rough spots. This step ensures that the glue adheres well and creates a smooth foundation for your decoupage. Wipe the tray clean with a damp cloth and let it dry completely before moving on to the next step.
Choose Your Design
Select the decorative paper you wish to use. This could be anything from vibrant patterns to elegant designs. Cut the paper into desired shapes or pieces; you can go with squares, rectangles, or even freeform shapes. It’s helpful to lay out the paper pieces on the tray first to visualize your design before adhering them.
Decoupage Process
Now it’s time for the fun part! Follow these steps to apply the decoupage:
- Apply Glue: Use your paintbrush or sponge brush to apply a thin layer of decoupage glue onto the area of the tray where you’ll place the first piece of decorative paper.
- Stick the Paper: Carefully position your cut piece of paper on the glue-covered area. Smooth it down gently with your fingers to eliminate air bubbles.
- Seal the Paper: Once the paper is in place, brush another layer of glue on top of it. Start from the center and work your way out to avoid trapping air. This layer helps seal the paper and makes it more durable.
- Repeat: Continue adding your decorative pieces in the same way, overlapping them as needed to create a cohesive look. Don’t hesitate to use smaller details for added flair!
Let It Dry
After all your pieces are applied, allow the tray to dry completely. This may take anywhere from 1 to 4 hours depending on the humidity and temperature of your space. Patience is crucial here to ensure a strong hold.
Seal the Tray (Optional)
For added durability, especially if the tray will be used frequently, consider applying a sealant. Choose a clear, waterproof sealant and apply it over the decoupage using a clean brush. Allow it to dry thoroughly according to the manufacturer’s instructions.
Enjoy Your Beautiful Tray
Your beautifully decorated tray is now complete! It can serve many purposes, from holding drinks to showcasing decorative items. It’s the perfect way to showcase your creativity while enhancing your space.
Get Inspired
If you’re looking for more inspiration and ideas about decoupage techniques, you can check out Mod Podge Rocks Blog and Craftberry Bush, where you’ll find numerous projects and tips.
Take pride in this personalized piece of decor that reflects your style and creativity. Not only is it a nice addition to your home, but it is also an enjoyable way to spend your time crafting! So grab your materials and start your decoupage journey today!
Tips for Choosing the Right Images and Patterns
Decorating a tray with decoupage is an enjoyable and creative way to spruce up your home decor. An essential part of this process is choosing the right images and patterns. The images you select can define the overall theme and aesthetic of your project. Here are some practical tips to help you make the best choices.
First, consider the purpose of your tray. Will it be used to hold drinks, serve snacks, or display small items? Identifying its function can help guide your selection of images. For a tray intended for serving, you might opt for cheerful, vibrant patterns. In contrast, a decorative tray could feature serene images or intricate designs that reflect your personal style.
Choosing a Theme
Establishing a theme is crucial to the decoupage process. Do you want your tray to convey a rustic charm, a modern look, or perhaps a vintage feel? Your chosen theme will impact the types of images and patterns that resonate best. Here are some themes to consider:
- Farmhouse Style: Go for country scenes, botanical prints, or wood grain patterns.
- Bohemian Vibes: Select vibrant colors, floral designs, or eclectic patterns.
- Modern Minimalism: Think abstract shapes, monochrome colors, and geometric patterns.
- Vintage Elegance: Look for classic illustrations, lace motifs, or old-fashioned advertisements.
Finding the Right Images
Once you’ve chosen a theme, it’s time to find the perfect images. Look at various sources such as magazines, wrapping paper, or even fabric. Here are some platforms where you can find excellent images:
| Source | Description |
|---|---|
| Unsplash | A free stock photo site, perfect for finding high-quality images. |
| Pexels | Offers a wide array of free stock images and videos, ideal for decoupage projects. |
| Freepik | Provides numerous free and premium illustrations and images. |
When selecting images, ensure they are of good quality. Clear, high-resolution images not only look better but also translate well into the decoupage process.
Consider Color Schemes
Color plays a vital role in how images work together on your tray. Aim for a balanced color palette that complements the colors of your home. Here are some tips for choosing colors:
- Monochromatic: Use different shades of one color for a sophisticated look.
- Analogous: Choose colors that are next to each other on the color wheel for harmony.
- Complementary: Opt for colors opposite each other on the color wheel to create vibrant contrast.
Patterns and Texture
Patterns can add depth and interest to your tray. When selecting patterns, think about how they will work with your images. Here are some ideas:
- Floral and Nature Patterns: These work well in rustic-themed trays.
- Geometric Patterns: Perfect for modern or minimalistic designs.
- Textured Patterns: Consider using distressed textures to create a vintage feel.
Personal Elements
Your tray can reflect your personality or tell a story. Don’t hesitate to include personal images, such as family photos or favorite quotes. This gives your tray unique character. Here are a few tips:
- Scan and print personal photos for a one-of-a-kind touch.
- Use scrap materials, like postcards or souvenirs, that hold special meaning.
- Experiment with arranging images and patterns before deciding on a final layout.
Remember, decorating a tray with decoupage is about expressing yourself. Take your time to choose images and patterns that resonate with you. Happy crafting!
Ways to Use Your Decoupage Tray in Home Decor
Decoupage trays are a versatile and fun addition to your home decor. Not only do they reflect your creative personality, but they also offer practical uses around your space. Let’s explore some wonderful ways you can incorporate your decoupage tray into your home decor.
1. Serve as a Coffee Table Centerpiece
One of the best ways to showcase your decoupage tray is by placing it on your coffee table. Fill it with decorative items such as:
- Candles in varying heights
- A small potted plant or fresh flowers
- Stylish coasters
This setup creates a focal point in your living area, inviting guests to admire your taste while serving a functional purpose.
2. Display Your Jewelry
Turn your decoupage tray into a beautiful jewelry holder. By placing it on your dresser or vanity, you can organize your favorite pieces. Choose a tray with vibrant designs that complement your existing decor.
Here are some creative ideas for displaying your jewelry:
- Use small bowls for earrings and rings.
- Lay necklaces out flat to avoid tangling.
- Incorporate a vintage mirror under the tray for added elegance.
This not only keeps your jewelry organized but also adds a touch of personal flair to your space.
3. Organize Kitchen Essentials
A decoupage tray can be a charming way to organize essential kitchen items. Place it on your countertop or dining table to hold:
- Salt and pepper shakers
- Cooking oils and spices
- Fruit or bread for easy access
This creates a tidy look and makes everything needed for meal prep accessible.
4. Create a Stylish Bathroom Tray
Transform your decoupage tray into a chic bathroom accessory. Use it to hold daily essentials such as:
- Soap and lotion dispensers
- Perfume bottles and beauty products
- Makeup tools and brushes
This organization method keeps surfaces clear and adds a pop of creativity to your bathroom decor.
5. Use it for Seasonal Decor
Switch out your decoupage tray decorations according to the season. In spring, fill it with pastel-colored decor items like eggs or flowers. During fall, incorporate small pumpkins or gourds. Winter can feature holiday ornaments and candles.
This enables you to refresh your home decor with minimal effort, showcasing your adaptability and style throughout the year.
6. Craft a Mini Herb Garden
Enhance your kitchen or dining area by using your decoupage tray as a mini herb garden. Plant small pots of culinary herbs like basil, rosemary, and thyme. This serves to add freshness to your meals while decorating your space. Here’s how to set it up:
| Herb | Light Requirements | Watering Frequency |
|---|---|---|
| Basil | Full sunlight | Weekly |
| Rosemary | Full sunlight | Bi-weekly |
| Thyme | Full sunlight | Weekly |
Not only does this provide fresh ingredients for your meals, but it also brings life and color to your kitchen.
7. Create a Gift Tray
Your decoupage tray can also serve as a unique gift. Fill it with various goodies like:
- Gourmet chocolates
- Candles and bath products
- Handmade cards or personalized items
This not only showcases the tray but also creates a thoughtful gift that can be cherished long after the items are used.
Whether you’re hosting guests or simply enjoying your space, these creative uses for your decoupage tray can enhance your home decor. Visit Hometalk for more inspiration and tips on decoupage crafts. Additionally, Craftionary offers exciting projects that can help you personalize your decor even further.
Integrating a decoupage tray into your home brings functionality and artistic flair to your surroundings. Use these ideas to unleash your creativity and make your space uniquely yours!
Conclusion
Decorating a tray with decoupage is more than just a crafting project; it’s an opportunity to infuse your personality and style into your home decor. By employing creative techniques, you can turn an ordinary tray into a beautiful statement piece that reflects your taste and creativity. Remember to gather the essential materials before you get started to ensure a smooth crafting experience.
Following the step-by-step guide will help you master the decoupage technique, giving you the confidence to transform other items as well. When selecting images and patterns, consider your space and choose designs that harmonize with your existing decor. The right visuals can elevate your tray from a simple piece to a captivating focal point.
Once your tray is beautifully decorated, think about the various ways you can incorporate it into your home. Whether you use it for serving drinks, displaying candles, or organizing stationery, your decoupage tray can serve multiple purposes. Not only does it serve a practical function, but it also adds a touch of elegance and artistry to your living environment.
Ultimately, the joy of decoupage lies in its versatility and the ability to make something unique. By using your creativity and following the tips shared, you’ll create a stunning tray that becomes not just a decorative object, but a cherished piece in your home. Get started on your decoupage journey today and enjoy the process of crafting something special!