
Hey there, vibe makers—I’m Kylie, and I’ve got a DIY that’ll give your kitchen a voice!
Ever walk into your kitchen and think, “This place needs some sass”? Yeah, me too. I’m Kylie, your kitchen vibe curator, and I’ve got a secret weapon: DIY kitchen signs. They’re like little love notes to your space—quirky, cozy, and oh-so-you. After sanding shelves last time, I’m itching to grab some paint and make your walls (or counters) talk. No art degree needed—just a “decorate with…” vibe and a little Kylie magic.
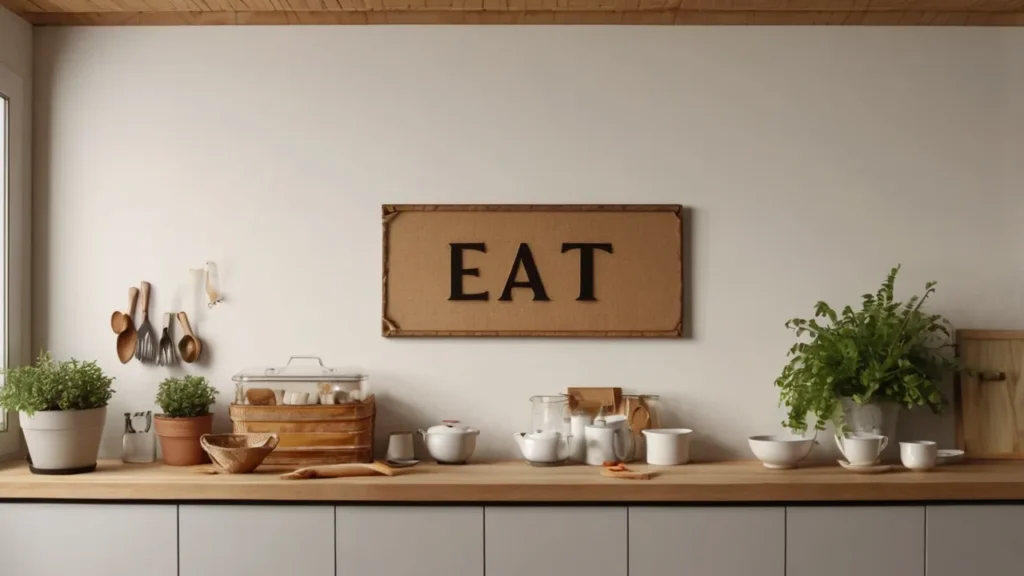
Signs are my obsession—they add personality without cluttering up your kitchen. Think “Eat” above the stove or “Vibe” by the coffee pot—simple, but they hit different. This DIY’s all about cheap finds, easy steps, and that rustic charm I can’t quit (you saw my Italian post, right?). Ready to turn your kitchen into a chatterbox? Let’s dive into my three-step vibe to make signs that’ll steal the show—and your heart!
Step 1: Pick Your Base—Kylie’s Picks
Why It Works: The right base sets the stage—rustic or sleek, it’s your call.
I’m a sucker for a good canvas—doesn’t matter if it’s wood or an old frame, it’s gotta feel like home. This is the “decorate with…” foundation—pick something that sparks joy, and we’ll vibe it up from there.
Kylie’s Tips:
- Wood Wins: Grab a scrap plank—think 12-18 inches long. I snagged one for $1 at a thrift store—knots and all, pure rustic gold. Old cutting boards work too—Kylie’s got one that’s now a sign star.
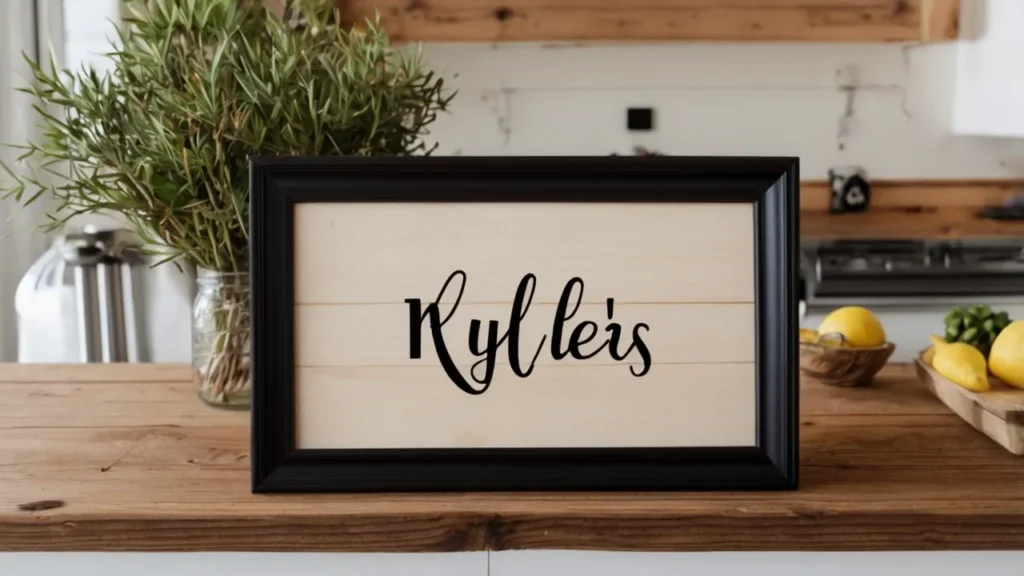
- Frame It: A cheap picture frame—$2 at a yard sale—pop out the glass, paint the back. I’ve got a black one that’s screaming chic vibes.
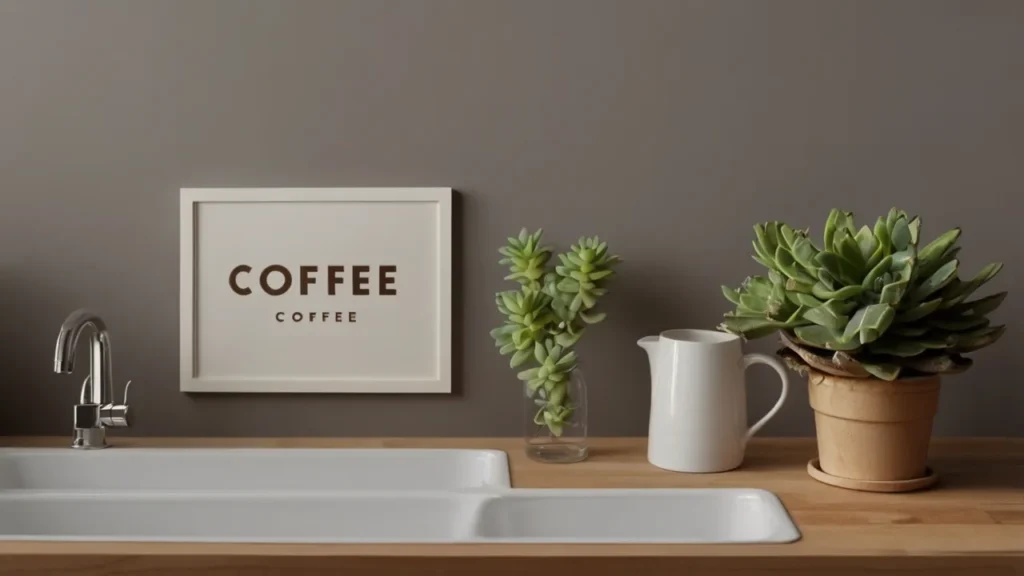
- Cardboard Hack: No wood? Cut some cardboard—free and fast. I’ve got a “Coffee” sign from a cereal box—don’t knock it ‘til you try it!
Kylie’s Vibe Check: Size matters—too big overwhelms, too small gets lost. Aim for mug-sized width.
Step 2: Paint & Stencil—Kylie’s Flair
Why It Works: A splash of paint and a stencil make it pop—Kylie’s crafty heart sings here!
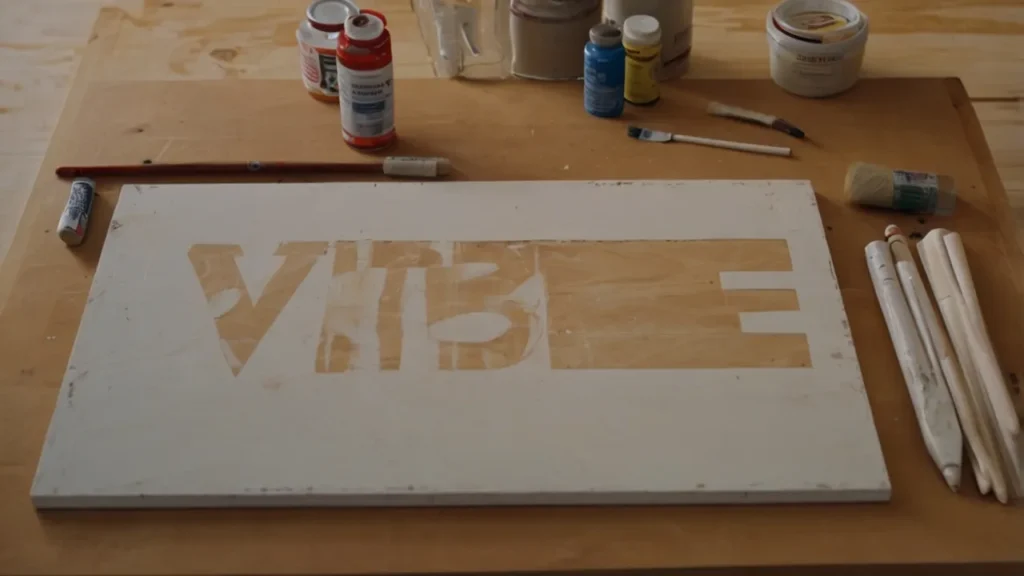
This is where your sign gets its soul—I’m all about that hands-on mess (in a good way!). Paint it, stencil it, and watch it turn into something you’d pay for—but you won’t, ‘cause Kylie’s got the cheapskate hacks.
Kylie’s Tips:
- Base Coat: Slap on some paint—white, black, or gray’s my go-to. I’ve got a $1 craft paint that covers like a dream—two coats, let it dry overnight.
- Stencil It: Grab a stencil (“Eat,” “Vibe,” “Chaos”)—$3 at a craft store—or freehand it if you’re brave. I’ve got a “Coffee” stencil I reused from a thrift frame—tape it down, dab with a sponge.
- Kylie’s Twist: Distress it—sand the edges or wipe tea over it. My “Eat” sign looks like it’s been loved for years—total vibe win.
Kylie’s Vibe Check: Don’t overpaint—smudgy’s fine, perfect’s boring. Rustic’s the goal!
Step 3: Hang It & Shine—Kylie’s Style
Why It Works: The right spot and a little flair make your sign the kitchen’s MVP—Kylie’s final touch.
You’ve got a sign that talks—now let’s make it sing! This is the “decorate with…” payoff—hanging it where it’ll vibe hardest, with a Kylie spin to seal the deal.
Kylie’s Tips:
- Hang Easy: A nail or adhesive strip—$2 at the store—does it. I’ve got a “Vibe” sign above my sink on a strip—no drill, no fuss. Lean it on a shelf (like my Day 4 DIY) if you’re lazy like me!
- Word Play: Pick your spot—“Eat” by the stove, “Coffee” near the pot. My “Chaos” sign’s by the fridge—Kylie’s life in one word.
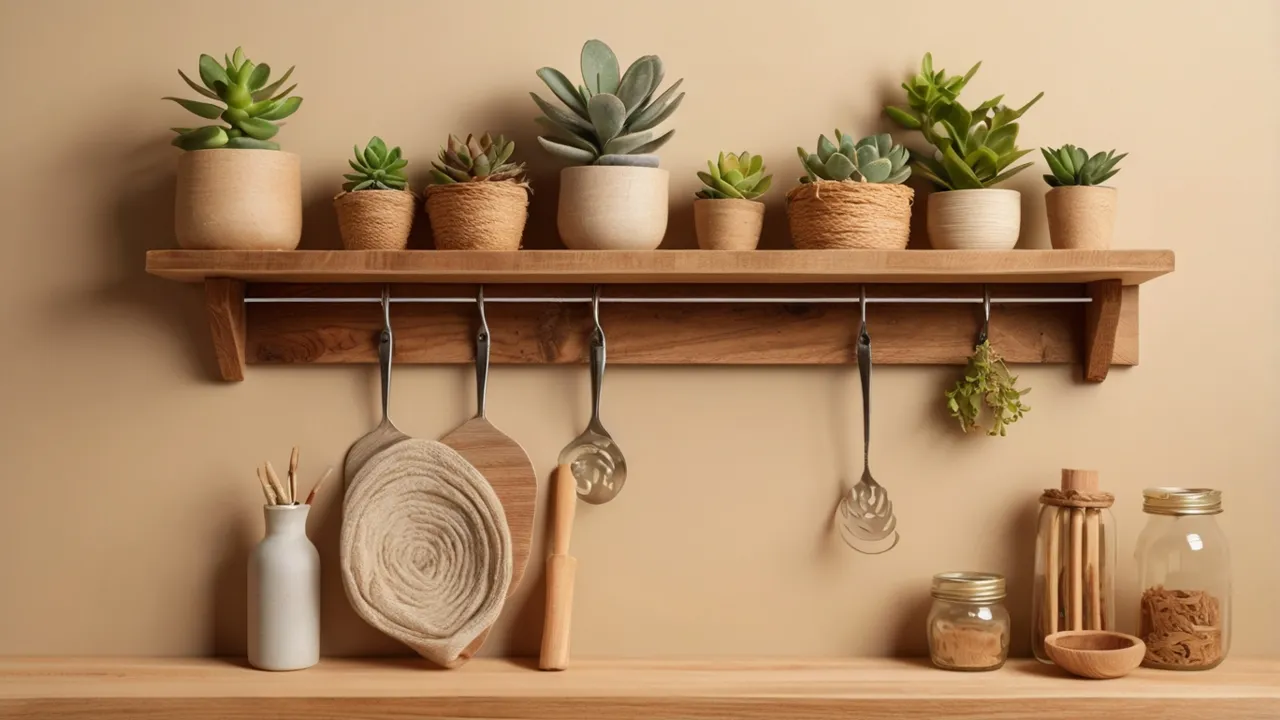
- Add Vibes: Pair it with a plant or mug—my “Eat” sign’s got a faux succulent next to it, tying back to my cabinet post. Keep it simple—two items max.
Kylie’s Vibe Check: Don’t crowd it—one sign, one accent. Let it breathe and talk!
Bonus: Kylie’s Sign Hacks
Why It Works: A little extra love makes it your sign—Kylie’s pro tricks for the win.
I can’t stop at basic—these hacks are the cherry on top that’ll have you grinning every time you see your sign.
Kylie’s Tips:
- Frame Pop: Add twine around the edges—$1 and hot glue, done. My “Vibe” sign’s got that rustic kick now.
- Double Up: Layer two signs—lean a small “Eat” on a bigger “Kitchen.” I’ve got a combo by my stove—double the vibe.
- Seasonal Spin: Swap words—“Snow” for winter, “Bloom” for spring. Keeps it fresh without repainting.
Kylie’s Vibe Check: Pick one—too many hacks, and it’s overkill. Less is more here!
Kylie’s Wrap-Up: Let Your Kitchen Talk!
There it is—Kylie’s DIY kitchen signs that’ll make your space talk! Pick a base, paint it with love, and hang it with flair—no art skills needed, just a little Kylie sparkle. These signs are your kitchen’s voice—whether it’s yelling “Eat” or whispering “Vibe,” it’s you.
KDecoreVibe is your home for kitchen love, and I’m just getting started. Got a sign idea brewing? A thrift find begging for paint? Drop it below—I’m all ears! Next up, I’m dreaming up more vibes—stick around for it. For now, grab a brush, sip something cozy, and let’s make your kitchen chatty. Catch you soon—Kylie’s cheering you on!