
Hey there, spring lovers—I’m Kylie, and I’ve got DIY crafts to refresh your kitchen with vibrant vibes!
Spring is here, and I’m buzzing to bring that fresh, bright energy into my kitchen—are you feeling it too? I’m Kylie, your kitchen vibe curator at KDecoreVibe.com, and after 17 posts of cozy magic (like my winter decor in Post 17 and herb planters in Day 10), I’m ready to share some springtime DIY crafts that’ll make your kitchen pop! It’s March 2025, the flowers are blooming, and your kitchen deserves a glow-up that screams “new season, new vibes”—all on a budget, of course, because Kylie’s all about that thrifty sparkle.
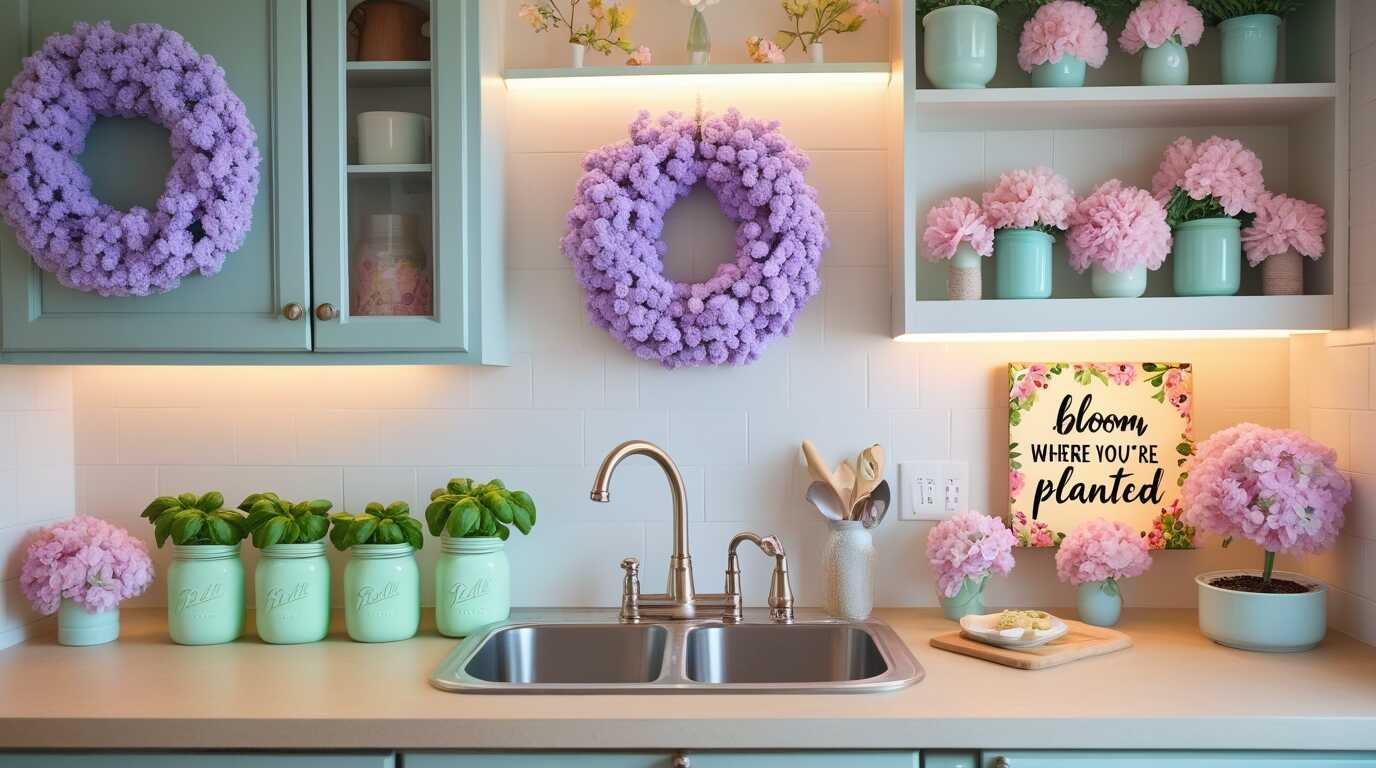
I’ve always loved spring for its promise of renewal—think pastel colors, soft florals, and a lighter, airier feel. After a long winter (and my cozy candle hacks in Post 17), I’m craving a kitchen that feels like a sunny morning. These “spring kitchen decor DIY” crafts are perfect for adding that brightness without breaking the bank. We’re talking pastel wreaths, jar planters, floral garlands, and painted signs—all easy, fun, and totally Kylie-vibed. Ready to craft your way to a spring refresh? Let’s grab some supplies (you probably have most of ‘em already!) and get started. Your kitchen’s about to bloom like never before!
Craft 1: Pastel Wreath Magic—Kylie’s Spring Welcome
Why It Works: A wreath adds a cheery welcome—soft pastels, spring soul.
I’m obsessed with wreaths—they’re like a hug for your kitchen! This “spring kitchen decor DIY” craft brings pastel magic to your space, perfect for hanging on a cabinet or above your island (like I styled in Day 2). I made mine last weekend, and every time I walk in, it’s like spring is whispering, “Hey, let’s vibe!”
What You’ll Need:
- A foam wreath base ($3 at the craft store—I snagged mine on sale).
- Pastel ribbon (lavender, mint, baby pink—$2 thrift find).
- Faux flowers (daisies or tulips—$4 from a dollar store).
- Hot glue gun (my trusty $5 tool—check your craft stash).
- Twine for hanging ($1 or use leftover string).
Kylie’s Steps:
- Wrap It Up: Start by wrapping your foam base with the pastel ribbon—I went with lavender to match my spring vibe. Secure the ends with hot glue, overlapping slightly for a full look. It took me about 10 minutes while sipping my morning coffee—multitasking win!
- Flower Power: Snip your faux flowers into small clusters (I used 5 daisies). Hot glue them around the wreath, spacing them evenly—I alternated colors for a soft, springy feel. Pro tip: Leave a little gap at the top for your twine loop.
- Add a Bow: Tie a small bow with mint ribbon and glue it at the bottom—my bow was a little lopsided, but that’s the DIY charm, right? It adds that handmade soul I love.
- Hang It Proud: Loop twine through the top and hang it on a cabinet knob or above your sink. Mine’s on my pantry door, and it’s giving all the spring vibes—I’m obsessed!
Kylie’s Vibe Check: Don’t stress about perfection—wobbly bows are cozy. Pastels are your spring BFFs—stick to 2-3 colors for a pro look!
Engagement Prompt: What’s your fave pastel color for spring? I’m loving lavender—drop yours below, and let’s chat wreath ideas!

Craft 2: Jar Planters That Pop—Kylie’s Green Glow
Why It Works: Jars bring rustic charm—fresh herbs, spring soul.
I’m a jar hoarder (guilty!), and this “spring kitchen decor DIY” craft is a nod to my herb planters from Day 10. These little planters add a pop of green to your counter, perfect for spring’s fresh vibe. I made a set of three last week, and they’re now my kitchen’s happy spot—let’s make yours shine too!
What You’ll Need:
- 3 small mason jars (I reused old jam jars—$0!).
- Acrylic paint (pastel mint—$2 at the craft store).
- Paintbrush (had one in my drawer—check yours!).
- Small herbs (basil, mint—$3 at the nursery).
- Pebbles for drainage (grabbed some from my backyard—free!).
Kylie’s Steps:
- Paint Prep: Give your jars a quick rinse and dry them—I learned the hard way that wet jars don’t paint well (oops!). Paint the outside with pastel mint, using two coats for a smooth finish. I did this on my porch, soaking in the spring breeze—it took about 20 minutes total.
- Add Drainage: Layer a few pebbles at the bottom of each jar—about ½ inch deep. This keeps your herbs happy by preventing soggy roots. I found my pebbles near my garden—nature’s gift!
- Plant Your Herbs: Pop your herbs into the jars, filling with potting soil (I had some leftover from Day 10’s planters). I chose basil because it smells like spring heaven—press the soil gently around the roots.
- Style It Up: Line them up on your counter or windowsill—I put mine near my sink, where they catch the morning light. They’re so cute, I can’t stop smiling every time I wash dishes!
Kylie’s Vibe Check: Don’t overwater—herbs like to sip, not swim. Mint paint keeps it springy, but try pink or yellow if that’s your vibe!
Engagement Prompt: What herbs are you growing this spring? I’m all about basil—share yours below, and let’s swap growing tips!

Craft 3: Floral Garland Glow—Kylie’s Spring Swag
Why It Works: Garlands add whimsy—floral charm, spring soul.
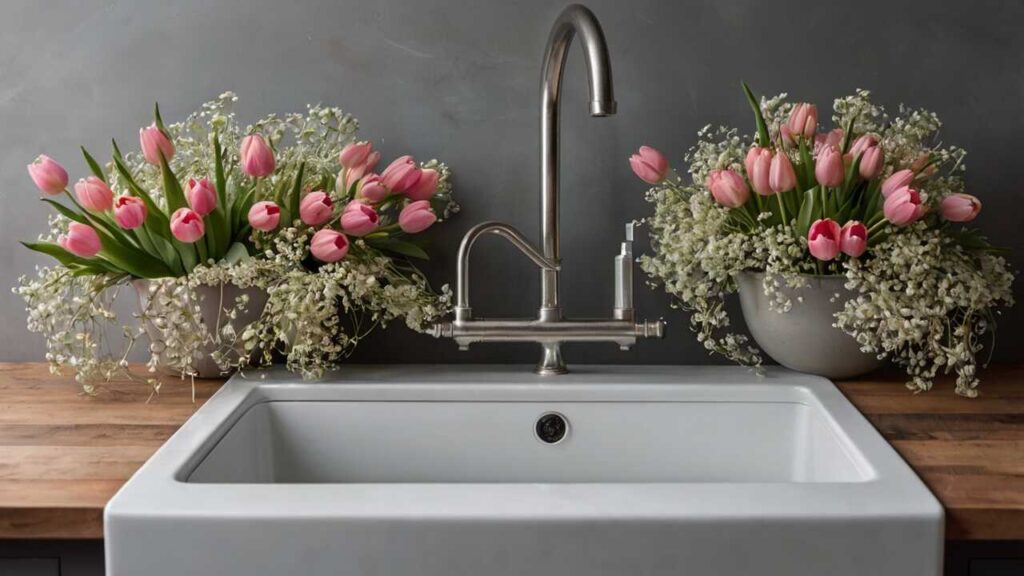
I love a good garland—it’s like a party for your kitchen! This “spring kitchen decor DIY” craft brings floral magic to your space, perfect for draping over a shelf (like Day 13’s shelves) or above your island. I made mine while binge-watching a rom-com—crafting and chilling, my kind of Saturday!
What You’ll Need:
- Faux floral stems (tulips, baby’s breath—$5 from the dollar store).
- Twine or jute rope (3 feet—$1 or use leftover string).
- Scissors (your trusty kitchen pair).
- Hot glue gun (yep, we’re using it again!).
- Optional: Mini clothespins ($2 for a pack—cute touch!).
Kylie’s Steps:
- Prep Your Florals: Snip your faux stems into smaller pieces—I used 6 tulips and a handful of baby’s breath for a full look. Lay them out along your twine to plan your design. I went for a mix of pink and white—it’s so springy, I can’t even!
- Attach the Base: Hot glue the larger stems (tulips) to the twine first, spacing them about 4 inches apart. I wrapped the stem ends around the twine for extra hold—took me about 15 minutes while laughing at my movie.
- Fill It In: Tuck in the baby’s breath between the tulips, gluing where needed. I used mini clothespins for some pieces—it adds a rustic vibe I’m obsessed with (Day 4’s shelves would approve!).
- Hang It Up: Drape your garland over a shelf or tie it above your island. Mine’s above my sink, and it’s like a spring breeze every time I see it—pure joy!
Kylie’s Vibe Check: Mix big and small florals for depth—pros don’t overstuff. Clothespins add charm, but skip ‘em if you’re minimalist!
Engagement Prompt: Where would you hang your garland? I’m loving mine above the sink—drop your spot below, and let’s vibe!
Craft 4: Painted Sign Spark—Kylie’s Spring Words
Why It Works: Signs add personality—painted charm, spring soul.
I’m a sucker for signs (Day 5 and Day 14, anyone?), and this “spring kitchen decor DIY” craft brings a handwritten vibe to your space. I made one that says “Bloom Where You’re Planted,” and it’s giving my kitchen all the spring feels—let’s make yours just as cute!
What You’ll Need:
- A small wooden board (I used a 12×8 scrap piece—$2 at the craft store).
- Acrylic paint (white for the base, pastel pink for lettering—$2 each).
- Paintbrush and fine-tip brush (for lettering—had mine already).
- Pencil and eraser (for sketching—kitchen drawer staples).
- Optional: Sandpaper (for distressing—$1 or skip it!).
Kylie’s Steps:
- Base Coat: Paint your wooden board with white acrylic paint—two coats for a smooth finish. I did this while chatting with my sister on the phone—took about 20 minutes to dry between coats. Sand the edges lightly if you want that distressed look (I did—love the rustic vibe!).
- Sketch Your Words: Lightly pencil your phrase—I went with “Bloom Where You’re Planted” because it’s so springy and hopeful. Use a ruler to keep it straight (I didn’t the first time, and it was a mess—lesson learned!).
- Paint the Letters: Use a fine-tip brush and pastel pink paint to trace over your pencil lines. I went slow, humming to some tunes—it took me about 30 minutes, but the result is so worth it. Don’t worry if it’s not perfect—wobbly letters are part of the charm!
- Display It Proud: Prop it on a shelf or lean it against your backsplash. Mine’s on my Day 13 shelf, next to a jar planter from Craft 2—it’s like spring exploded in the best way!
Kylie’s Vibe Check: Pick a phrase that sparks joy—pros keep it short. Distressing adds soul, but skip it if you’re all about clean lines!
Engagement Prompt: What phrase would your spring sign say? I picked “Bloom Where You’re Planted”—share yours below, and let’s inspire each other!

Kylie’s Wrap-Up: Craft It, Love It, Spring It!
There you have it—Kylie’s DIY spring kitchen refresh crafts to brighten your space! A pastel wreath to welcome spring, jar planters for green glow, a floral garland for whimsy, and a painted sign for personality—no big budget needed, just a little Kylie magic. Grab that old jar in your pantry or that scrap wood in your garage, and let’s make your kitchen a spring haven.
KDecoreVibe is your vibe playground, and we’re at 18 posts—2 to go ‘til 20! I’m so excited to see your spring crafts—snap a pic of your wreath or sign and share it below. What’s your fave craft from this post? I’m torn between the garland and the sign—let me know yours! More vibes are coming—Post 19’s up next with spring organizing hacks, so stick around. For now, grab your glue gun, soak in that spring sunshine, and let’s make your kitchen the happiest spot in your home. Catch you soon—Kylie’s cheering you on!